aboutfaqfeaturesgalleryblogrollcontact
Showing posts with label maisondestencils. Show all posts

Thursday, August 14, 2014

Graham's Room Redo, Phase 2: in which we do some arty stuff!

Second post took longer than I intended!

Graham's room was this gigantic, sprawling redo.  You know those projects that spawn other projects while you are planning them out?  Like a Home Depot fueled hydra?  Yes, it was kind of like that.

I think we took three months to actually complete it.  I set a mental goal of having it look presentable by his birthday, which was at the end of June.  In my first post, you got to see how the faux brick wall came out, along with the magnet wall.  We wanted the room to have this garage feel to it, so I really wanted to create enamel signs to hang in the room.

I don't collect enamel or tin.  I also don't have any particular brand fondness, so I didn't have this burning need to go pick up old Penzoil signs.  So I got the notion to create vintage inspired enamel signs that were centered around my family.

I used neither vintage tin nor enamel paint.  So here's how I fudged the look.

I started out with roof flashing.  You can buy this in precut sheets at Home Depot or Lowes.  I used a few of those and I also used some scrap left over from the magnet wall.


Here's what it looks like.  The metal has this fun, bumpy flake texture.   I think these are a dollar or so a piece and they're about 4x6 inches.  Little kid or clumsy adult warning:  SHARP EDGES!

I didn't do anything to the edges because these got affixed high on walls, but if they were going to be accessible to little hands, I would have a metal shop or other handy individual bend brake the edges. 

Onto the paint.  I just used house paint.  Sure, you could use a metal primer like Jasco.  The paint might adhere better, but probably not.  You could also sand the metal beforehand, but I'm going to be real, I was making a bunch of these and I can only apply so much effort.

So I just rolled two coats of black paint on and here is the result.


I get more glare and lens flares than a J. J. Abrams movie.  It's totally intentional.  Isn't that texture rad?  I sure think so.  So I created some stencils specifically for this project, but this first one is just a French inspired gas stencil.


Do you see how my blue painters' tape is touching the paint?  If you're going to employ this method, don't let the tape touch the paint.  The adhesion is just not there and when you remove the tape, the paint is going to come right with it.  Like this:


It's easy enough to touch up, which is what I did.  But in future tin signs, I just made sure the tape was affixed to the stencil and then whatever medium was beneath me, i.e. table, concrete, horizontal plane.  That's two coats of white paint I did with a stencil brush, by the way.


This second sign was large and time consuming.  As a rule, I don't like using a roller on anything stenciled.  I just haven't had good luck with it.  My mom is a pro at that technique and she can do it on fabric with no bleed.  Maybe it's a skill that comes with wisdom and age?  I used a stencil brush for all this real estate, this sign is about 3 ft by 4 ft.  1ER is a French way of abbreviating Premier.  So essentially, this says:  Premier Graham (like Grand, get it?  GET IT?) Prix.

I cut all these individual components out of stencil scrap material, and in the midst of stenciling that darn race car, the stencil totally slipped.


The whole car was off like that.  Some words were said.  But it cleaned up just fine.  Paint is amazing. 


This was a fun one because I did a drop shadow in the maroon color.  Drop shadows are great.  We sell some stencils with drop shadows built in, but as a rule, they are very thin openings for paint to go through.  You can make pretty much any stencil you want have a drop shadow by doing a base coat and letting it dry.  Then you simply move your stencil up and to the left a smidgen and use a contrasting color of paint. 


I don't have any process pictures of the Pit Lane sign.  I did that one out of scrap.  I love the gloved pointing hand.  My son has a nanny cam in his room and the thing is unsightly.  I wanted to mask its presence in some way.  So my husband cut this jalopy I found at Home Goods in half and mounted it to the wall.  Sometimes I think it now looks like a Nanny Cam being driven around by Henry Ford.  I'm okay with that absurdity.

The pipe you see coming down from the jalopy is electrical conduit.  We used this as cord hider.  My husband split this in half with a grinder so it would sit flush against the wall.  He then affixed it to the wall with pipe tape.  We use this around my son's television as well. 


I totally stole this street sign in the middle of redoing this room.  It was a crime of opportunity not passion.  I was driving to Target on a blustery day and there, forlorn, in the middle of the road was this street sign.  It was pathetic.  It was about to get run over.  I was saving it, really.  I did my civic duty by putting on my hazards and running out into the road to rescue it.  You have no idea how large a street sign is until you are loading one into the back of your SUV.  I asked my sister-in-law (who is a police officer) and she totally told me I was cool.  So I feel good about the whole incident.


The other piece of non-stencilled art in the room is this wicked cool poster of race cars signed by the drivers who race them.  We have a friend who is a race-car driver mechanic (I know right?  That's like a job little boys {or girls who rock} dream of having but then they get real and become actuaries.)  Anyway, he got all the signatures and we were totally jazzed and knew it had to go in the room.  My husband is a huge open-wheel racing nerd.   

Speaking of open-wheel racing, one of the more laborious projects for this room was this curtain I designed which covered some unsightly shelves in Graham's now exposed closet.  I regret that I do not have process pics as it was a wee bit difficult to photograph in situ.  That is art history talk for: in the space where it's supposed to be. 


Those are all famous open wheel racing courses.  Neat right?  The fabric for the curtain is just drop cloth from Home Depot.  The lettering is not stenciled, it's actually jersey fabric (I buy old T-shirts from Goodwill).  I then cut them out via the same method I cut our stencils and affixed them to the drop cloth. 

The last project for the room was the race car bed.  These race car beds are pretty spendy new.  I think we found this one on Craiglist for $30.   


Here it was.  So....blue.  I could not stand it.  I decided to paint it one day when my husband went on a business trip.  I used Annie Sloan Chalk Paint in brick red.


This paint is amazing to work with.  There is virtually no-odor, which is a wonderful thing when you're painting a bed that a small person needs to sleep on.  The texture is just phenomenal.  I knew that I couldn't leave the bed with just paint on it.  It needed some sort of clear coat.  In the midst of this project, something else cool happened.  We welcomed a new retailer to the Maisondestencils family.  Cindi Rowley Designs in Valencia, CA.  Now the cool thing about that is:  1)  She's awesome and 2)  We live in Valencia!  So finally there is a store where we live where our stencils are stocked.  Prior to this, Laura and I have joked for years that we just need to bite the bullet and move to Alabama.  Cindi's store is great, she stocks a lot of the projects you folks are familiar with like Annie Sloan, Artisan Enhancements, etc.  She sells this clear coat by General Finishes.  It has the lowest odor of any clear coat I've ever used.  I really liked it.  Tragically, after completing this project, Theodore knocked over the can in the garage and WALKED through the puddle.  Now I can remember his footprints at that size, forever.


That's after 2 coats of the General Finishes.  I did 5 coats total.  The bed definitely needed that sheen!  I really like how the satin finish brought out the vibrancy of the Annie Sloan Brick Red.  You may notice that I removed all the Little Tykes emblems from the bed.  There is one spot for an emblem on the front and one emblem on each tire.


The last step for this project was to design some emblems for the bed that tie into the total room design.  I wanted to use the wings featured in the No 2 Petrole sign and a G, for Graham.  I cut my design out of balsa wood.


Next step was to paint them.  I had a backer piece I painted white.  I used spray paint for this project.


Following that, I spray painted all the detail pieces like the frame, wings, and G black.  I used spray paint here as well.  I then glued all the pieces to the white backer with Gorilla Glue.  Use less glue than you think you'll need.


After these dried, they got a coat of spray poly.  Then it was time to glue them on the race car bed!


Looks sharp!  Graham loved these.  When he walked into his room the first day after they were on the bed he said, "Oh!  It's a G!" 


Here's a picture of the whole room.  I realize I didn't include any pictures of the Theodore Magasin de Pneus sign.  That means Theodore's tire shop.  It utilizes the same fun wheeled tire graphic that I have on the race track curtain.

This project was so much fun.  Graham and Theo both love the room and play in there every day.  And now it isn't such a horrendous eye sore.

Hope you enjoyed!

Friday, February 7, 2014

The Absentee Blogger Returns!

Hey folks!

Well I've been seriously negligent on my blog posts and I apologize for that.  2013 was a doozy of a year.  Our business has been growing by leaps and bounds, major thanks in part to our awesome customers and friends.

Alongside our business upswing, life keeps happening.  (Funny how that works.)  When I started the Maisondestencils blog, I lived in sleepy Astoria, Oregon with my husband and our older son.  I treasured the rain, our amazing friends and neighbors, being a Goonie for life, and the historical significance of our town.  I loved our Craftsman home, which was featured in quite a few blog posts.  It turns 100 years old in 2014. we were going to throw it a birthday party. 

In April of 2013, our older son was diagnosed with Autism.  I was due to have our second son within weeks and we were faced with a very difficult dilemma of living near no family and suddenly needing a lot of support for his future.  You may or may not be aware that children diagnosed with Autism (or ASD) now have better support than ever and are eligible for amazing services, but these services vary wildly from state to state.  Oregon, we came to find out, did not offer us the best chance for our son's future.  So we left everything behind and moved back to California, where my Mom and Dad and Laura, (my sister and Maisondestencils founder) live.

The age 2-3 year is pretty pivotal for kids on the Autism spectrum.  Graham, my older son, is now 2.5 and we're knee deep in services for him (We do about 25 hours of therapy a week).  He's doing extremely well (He just asked me for pizza at 6 AM!)  and while we don't have a crystal ball, the future looks bright.   This is a major reason why I haven't been putting out many blog posts.  They would probably read, "I answered email and took Graham to speech therapy.  Answered email and went to occupational therapy."  lol!

We'd been in our new house in Southern California for a few months when my husband said to me, "I don't think I want to move anymore.  I think we're done."  And I agreed.  We've both moved a lot in our lives and while I had dreamed that we'd always live in Astoria, moving to So Cal had a note of finality to it.  So I made a custom stencil I had always wanted to make for my family, but for some reason, always put off.  I wanted something that would highlight every place we've lived, every stop on our journey. 


I really love the way it came out.  I bought a piece of plywood at Home Depot which my husband ripped down to size.  The denim blue color is actually a few old paint colors I mixed together.  Total cost, $6! 


I also want to point out that I attempted to pick up (Bless you people who actually stage your pictures) and still missed a sippy cup!  That's Graham in the picture.  He's watching Cars right now.  :)  

Laura came over (we only live 10 minutes away now, nice perk!) and she loved the sign.  She told me I needed to list the concept as a custom on the website, so I decided to do just that.  You can check it out here

Things are finally calming down now as we unpack our last boxes, so I hope to be back in the blogosphere more.  We also have plans to launch our Youtube channel with a little more oomph in 2014, so keep your eyes peeled for that.

Hope you've all been doing well.  I do keep on Facebook, so I see a lot of familiar faces there.  We truly feel blessed to have the nicest customers and it's our privilege to work with you guys.  I also want to mention that we love designing customs (obviously!) so if you ever have an idea you need help executing, email us at info@maisondestencils.com.

Take Care!

Thursday, September 5, 2013

Website Wednesday: Our Latest Adventure

Hey Readers,

Wow!  We have had a whirlwind month here at Maison.  Wholesale business is jamming and our retail customers are more excited about stenciling than ever.  We are so lucky to have such enthusiastic clients. 

Just in case you're not on the mailing list and not on our Facebook feed, we thought we'd broadcast our latest news here on the blog as well.

We are proud to present our newest line of stencils, Les Enfants Stencils.  Les Enfants is our own special line of childrens' stencils.  This product is perfect for decorating nurseries or themed rooms.  We also have tons of customization options, with more on the way.  

Because I have two little kids, I am always thinking of ways I can use stencils in their rooms.  Graham, my older boy, has a woodland themed room, so he's got all kinds of deer, foxes, and the like.   Teddy, my new little one, well poor guy, his nursery isn't even done (he's only 5 months old!).  But since his name sake is both one of our most awesome presidents and the teddy bear, my plan is do an accent wall that has one of my favorite quotes by Mr. Roosevelt himself and have various bears around the room.

We're offering 20% off your first purchase at Les Enfants, now through September 8th with promo code welcome (all lowercase).  We're always looking for great ideas for kids' stencils too.  So if you've got a great concept you want made for a custom or just an idea for us to put in the store, email us at info@lesenfantsstencils.com.

We've done all kinds of awesome themed subways based on popular choices for kids' rooms.  Check them out!


 These two are from our Western category.  


The Knights of the Round Table subway is from Fantasies, the Baseball nicknames is from Sports.  Love that one!  Some of our stencils would be great for a man cave as well!

Hope you all are doing well and beating the heat.  Bring on Halloween, I am ready for fall!

Thursday, August 15, 2013

Website Wednesday: Stencils to Fit any Budget!

Howdy all.

Do you ever wonder where your stencils come from?  And the circumstances surrounding their creation?  I'm sure that's all you ever think about, right? 

 You've probably imagined this amazing Maisondestencils factory run by well mannered elves on leave from creating Christmas toys.  Sadly, this is not the case.  We, (by we I mean our powerhouse staff of four) create all the stencils in-house with love and lots of coffee. 

So check this:  my oldest fell asleep in his room in the house and I have my new baby in a bouncer out in the garage (I know, mother of the year right?).  I am checking on my older boy via webcam (God bless technology) when the new baby falls asleep in the garage!   So little Theo and I are packing orders out here (I seem to be doing most of the work...) and I decided I'd take a break to tell you about another cool feature you can use at the new website.


Sometimes, you do not have a million dollars to spend on stencils.  We totally get it.  Maybe things are tight and you know that you have $25 you want to spend on a stencil, but you're really not sure what all you can get for that.  The good news is you can do exactly that on the new site.  Check it out.

Let's say you want to buy a new stencil in our Holiday category.

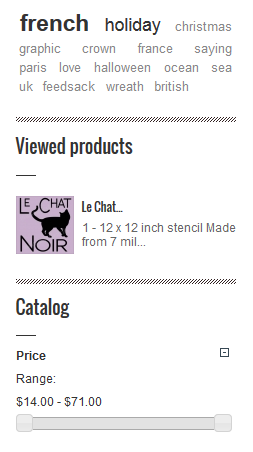
If you check out the bottom left, you will see a slider bar under the word Catalog.


That slider bar controls the price of the products displayed.  So you can slide it to the left to limit your results.  I slid mine to the left and set it to $24.83.  113 results, that's a whole lot of stencils you can still buy for under $25!!

That's all for now, stay tuned for more fun Feature Fridays and Website Wednesday additions.
 

Thursday, July 11, 2013

Website Wednesday: Top Sellers

Howdy there stencil folk!

We're in our 2nd week of use with the new website and so far the feedback has been awesome.  We're still not done implementing changes, but I thought I would take some time a couple days per month and highlight some of the great features our new site has. 

Our entire goal with this site is to make it easier for you, the end user, to search our catalog.  We have A LOT of stencil designs (over 1000), and it is super interesting to see what draws people to our site.  As you may have surmised, "french stencil" is one of our top keywords, but every so often I see something wild and different that gets me on a whole new design track.  

An interesting thing to note is that in addition to specific keyword searches, one question we get all the time is, "What are your best sellers?"  This is a great question that our retailers and resellers often ask.  It's smart too because you guys all have great taste, so why not look at what other people are buying.  If you are in a retail environment, you want to select stencils that your customer base will like, and that can be a difficult task when looking at our catalog of 1000+ items.  (FYI, all our designs sell, anything that's not selling over time we cull from the catalog.)

So our new website has a link where you can see just that. 

Down on the bottom panel, there is a link that says "Top Sellers."  Here's a screenshot to illustrate.


 When you click that top sellers link, you are taken to a page that lists our best selling stencils, one after the other.  This list recalculates on the fly, so if we say, had a run on Union Jacks a week from now, the Union Jack stencil would move forward until it's near the front of this list.

This list is also only capturing data from the start of the new site, so it hasn't quite balanced what our perennial best sellers are.  In case you are wondering, Bee Crown Laurel 12x12 and Old World Style 1 Numbers are our two best selling stencils.  (Don't tell anyone I told you!).

I should be back next week with an awesome Feature Friday.  Until then, Au Revoir! 

Tuesday, June 25, 2013

12x12 Stencil Giveaway! Click for details! Exciting News! Exclamation Points Abound!

Wow!  We are excited round these here parts.

Let me tell you why!

We are launching a brand new website!  Woohoo!


Here is a sneak peek.  We want to thank the marvelous folks at Goodsie for being our training wheels for a year.  They handled some tremendous growth from us with ease.  But we have some amazing wholesale retailers and we knew we needed a better solution to handle ordering for the wholesale side of our business.

So we are very excited to announce that our new website will have user accounts!

What does that mean for you? 

  • You can save multiple addresses (We have lots of customers who have homes in both Canada and the US). 
  • You can look at your order history
  • Wholesale orders can be processed through our website 
  • You can save products for later
  • You can enter names and dates for custom stencils right on the website (I love this one!)
There are a ton more features, that's just a small snippet of the things we love about the new maisondestencils.  We hope you will too.  Our new site will be up by the end of the week.  So keep your eyes peeled for a fresh new look.

ONTO THE FREEBIES!

To celebrate this launch, we're giving away a free 12x12 stencil to 4 lucky readers. 

Check out this link to enter. 

Saturday, May 25, 2013

Feature Friday: Tuckerized Chalk Paint Chairs

I can't seem to get my Feature Fridays in on time.  Probably a combination of new baby, moving,(California here we come, right back where we started from) and some very exciting behind the scenes stuff here at Maison we'll be debuting soon.

Before I begin:  We're running a sale for Memorial Day weekend.  Save 20% with promo code mem2013.  Now through Monday!  Onto the feature!

I'm taking a much needed break from the chaos to show you this transformation.  It is amazing.  I want to stop everything I'm doing and try it out right now.  I have a lot of willpower, but I am crumbling. 

I present to you:  Chalk Paint Chairs, courtesy of Dana and Brooks Tucker. 


No, they didn't just refinish the arms and legs with Annie Sloan Chalk Paint.  They painted the chair fabric itself. 

Their method was informed by this blogpost over at Hyphen Interiors.  The short of it is:  They misted the chairs with straight water thoroughly.  Then they took a 50% mix of Annie Sloan Paris Grey and Water and painted the fabric.


They repeated this process a total of 3 times to get a finished coat that looks like this.


Then they painted a nice feedsack stripe on both the back and seat. 


It actually looks great just like this, but they put our lovely Jonas Schroder stencil on the seatback as well.  The result is marvelous.


The also rehabbed another chair, same way, using our Family and Friends simple stencil.  This one we ran as a freebie about six months ago.  We'll be adding it for purchase soon!


These came out so, SO great!  If you want to check out the Tucker's more in depth post, please click here.  Here's a link to their main website, they do amazing faux painting work. 


Sunday, April 28, 2013

Perhaps you've seen us lately!

So picture this:

As many of you know, I had a baby 2 weeks ago.  I am just getting back into the swing of things and my mother-in-law is visiting.  One evening, she was taking care of the new little one and my husband had just brought home burgers for dinner.

I had a rare moment to myself and I was scarfing down this insanely good cheeseburger (shout out to Custard King in Astoria) at our breakfast nook in the kitchen.  We order quite a few magazines for design ideas and the latest issue of Country Living had arrived.  So I decided I would flip thru the magazine while eating.

It's all pretty typical as far as magazine reading goes (you should totally pick up this issue for the Bargain finds, they are to die for this month) until I get to page 100 for an article entitled, "Building Character."

This spread is all about the home of Heather Salazar, who did a bang up job adding vintage charm to a newer build tract home.

As I was reading the article and looking at her design style, I found myself thinking, "She has really good taste!"

Then I got to page 104 and realized that she had excellent taste!


Does the anything about that very cool clock look familiar?  Why I do believe that is Lucas Moller in Gottingen, one of our most popular feedsack stencils!

You can only imagine how surprising it is to open a magazine and see your own work inside!   I called Laura immediately and the conversation went roughly like this:

"HAVE YOU READ THE NEW COUNTRY LIVING?!"
"Yes...."
"DID YOU NOTICE ANYTHING AMAZING?"
"I like all the chalkboard stuff?"  (It's true, we're in love with this right now.)
"IT'S MORE AMAZING THAN CHALKBOARD."
"I don't think we're talking about the same issue?"
"OMG JUST TURN TO PAGE 104!!!1"
"Holy ****!  That's our stencil!"


So thanks to Country Living and Heather Salazar.  I don't think we're credited anywhere in the issue, but it's fun to see our work out in the wild. 

If you want to make your own Lucas Moller giant clock to Flava Flav your own wall, look no further than our Feedsack category. 

Sunday, April 21, 2013

Feature Friday: The Paris Dresser

Okay, another late Friday post!

I've been meaning to show this transformation by Jeanne Palmer for a few weeks now.

She does amazing work.  Check out this armoire. 


I'll take one of these in my living room, stat!  Here's what the before looked like:


Nothing special.  Good bones though!  She had to strip the original paint, which was oil based.  No fun! 


Then she added the wooden gingerbread to the doors.  I like the depth they add.  She finished the whole piece of in Annie Sloan Paris Grey. 


Then she used our Paris Rue Henri stencil underneath the gingerbread on each door.  I just love the way this one turned out.   I love the door hardware too.  Perfect!

If you're interested in Paris Rue Henri, we offer it as a 12x12 in our French category.   It's a customer favorite. 

You should absolutely check out Jeanne's Facebook page, Cottage Chic Furniture.  She does before and afters of all all her transformations.  Really great stuff. 

Should be back with another stellar feature this Friday, if I can get my act together!  We're also running another sale on all our new stencils this week.  Keep your eyes peeled for an email reminder.  If you're not on our email mailing list, drop us a line at maisondestencilsinfo@yahoo.com and we'll get you added.

Au revoir!

Saturday, March 23, 2013

Feature Friday: Annie Sloan Chalk Paint Books

Technically it's Saturday, but it's been that kind of week.  :)

I just had to share with you guys, the lovely ladies at Annie Sloan Unfolded are using our stencils. 

Their most recent post highlights how you can use stencils and Annie Sloan products to create amazing antiqued books that look like they time traveled from the days of Gutenberg.  Gorgeous stuff. 


Debbie Dion Hayes did these books and I must say, they are stunning!

Also I learned from this blog post that Annie Sloan is making fabric now.  Like I needed another amazing product to spend $$ on!

So the process here is that you get a book, Goodwill would be a treasure trove for this.

Paint the book with Annie Sloan Graphite (2 coats), let dry.

Stencil with Annie Sloan Old White.  As far as I can tell, the stencils used here are Ave Des Champs Elysees SKU 551 - Chateau Gothic SKU 705 - Marche Aux Puces SKU 641.

Wax with Clear Soft Wax and Buff, Wax with Dark Soft Wax and Buff.

Dip a finger with Silver Gilding Cream and run along book edges.


I think the Gilding Cream is really what takes it to the next level.  These just look amazing.

Also, if you're considering becoming an Annie Sloan stockist, you get to use our stencils in your training class.  How cool is that?! 

All the stencils used in this project can be found in our French category. 

If you want to check out the original post, look no further than Annie Sloan Unfolded

Have a lovely weekend.  It's grey here, but not currently raining and we're supposed to have a 48 hour stretch of no rain.  Thus begins the eternal dilemma for Coastal Oregonians, do I paint or not paint?  The winter here is rough on a house, I repaint our porch and sills every spring. 

My little boy has been standing at the window and staring this morning so maybe we'll just go for a walk!  :)

Tuesday, March 19, 2013

Stencils Are Like Donut Holes

They are, trust me.  Delicious little confections, donut holes!  Are they really the leftover dough?  Probably not, but I like to think that every part of the donut is being used.

Have you ever thought about what happens to all the stuff we cut out of our stencils?  Where does it go?  Say you buy a fleur de lis stencil.  You essentially receive a square sheet with a fleur de lis cut out of it.  Which means that here in stencil production land, we have a fleur de lis donut hole.  A leftover part.  We cut a LOT of stencils every day, so we have lots of these donut holes.

I hear you asking, what do you do with all those little bits?

Well, we recycle a lot of the boring stuff.   In a perfect world, I would collect every letter and have a bin where all the like letters could go and if you wanted, I could send you a big bag of Es or a giant tub of Rs.  I think that'd be neat.  But please, I have a 2 year old.  I'm lucky if I get to vacuum and get my teeth brushed!

My confession is that I save all the neat stuff.  All our animals, our crowns, big chairs and chandeliers.  We have these wonderful neighbors next door and one of our neighbors works at the local shoe store, Gimres.  (Do visit if you live in Oregon, it's the oldest shoe store in the Western US and has wonderful shoes).  Gary, our shoe selling neighbor, has taken a lot of our floral bits to use in displays.


I think we need a stencil with a shoe graphic so we'll have leftover shoe bits for his next display!


A lot of my stencil donut holes I save to ambush my husband's office.  We had a run on Easter stencils this past month, and rabbits multiplied all over his desk over night!  


Special shout out to Embellish and Restore - who bought a few of our small horse graphics set recently.  I corralled those wild stallions to hang out on my husband's laptop today.   Whoa Nelly!

Hope you all are doing well!  We're busy busy with sales and I try to post every so often.  Keep sending in those pictures of your finished products, we'll get to them all in due time.  I've got a great project on deck for Friday.

All the best!

Friday, March 8, 2013

Feature Friday: Monika Wagner

Guten Tag und Glücklicher Freitag (that last bit means Happy Friday!)

We just had to share a fabulous set of stenciled things from one of our lovely German crafters, Monika Wagner.  She's got a Dawanda shop, which is basically like German Etsy, as far as I can tell.

Look at the treasures:


Pinboard using our Musee D'Orsay Address Stencil


Our Simple Family and Friends Stencil on a Leather Satchel


Key Collector with our Chateau Villandry Stencil


How great are these?  I love the satchel and I never would have thought to stencil on that!  She also has a bunch of amazing found objects, you should absolutely pop on over and check them out.

Thanks to Monika for letting us feature her wares!

Keep your eyes peeled for a promo code coming up this weekend.  We'll advertise it on our Facebook and Twitter as well.

Take care!

Friday, February 15, 2013

Feature Friday: The Typewriter Case

Happy Friday!

FYI:  30% off all stencils now through Wed, Feb 20 with promo code president2013.

This is such a unique feature, just had to share with you guys.

Betsy at My Salvaged Treasures took our "Family and Friends Gather Here" 12x12 Stencil and applied it to a vintage typewriter case. 


How gorgeous is that?  She also did a companion case with stencils from another source.  I love the little keys she added for extra decoration.

Here's the layout before she got started.  Good opportunity to show what our packaging looks like if you're not familiar.  All our normal sized (12x12, 5.5x11.5, 8x8, 12x18) stencils come packed in clear cellophane sleeves with backing.  If you get a large stencil like our 24x24 or 6x24 stencils, those will come wrapped in tissue and arrive in a tube.


 Great picture illustrating the amount of paint she used.  I've said it before, I'll say it again.   A little paint goes a long way and you can always add more! 


The peel-away.  No bleeding underneath the stencil and this is a rough surface.  I've been talking with one client recently who was concerned that the stucco texture on her walls might cause some bleed with stencils, which is definitely a legitimate thing to be worried about.  We sent out samples for her to test in an unconspicious area, but seeing that this bumpy typewriter case took paint beautifully leads me to believe she'll be in the pink.  Or white.  Or whatever color she chooses to paint!  :)


Family and Friends Gather Here is an incredibly popular stencil, we offer it in 2 varieties in 12x12, and one in 12x18.  We also have a Family and Friends simple that we ran a free promotion with a few months back.  We will be adding that for sale shortly.

If you'd like to check out the Family and Friends Family (not redundant at all!)  have a peek at our French category.

Thanks to Betsy at My Salvaged Treasures for showcasing her beautiful work featuring our product on her blog.  We're also going to be running a giveaway with her soon, so keep your eyes peeled.

Have a great weekend!